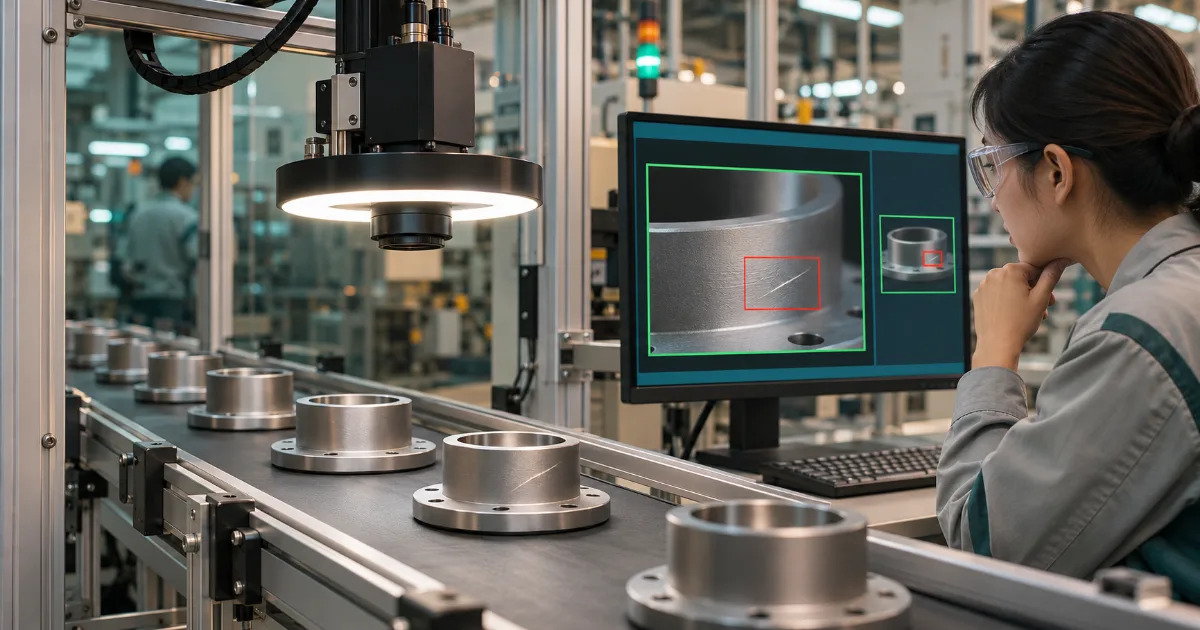
A visual defect detection pilot should answer a narrow operational question: can a controlled imaging station help reviewers find a specified defect on a specified product under real production conditions? The useful result is not a polished demo or a single accuracy number. It is evidence about missed defects, unnecessary rejects, image failures, processing time and the conditions in which the system can be trusted. Start with one station and a written acceptance rule; keep human inspection in place until the evidence supports a different workflow.
Define the production decision before choosing a model
“Detect all manufacturing defects” is too broad for a first project. A scratch on a cosmetic metal surface, a chipped edge and a wrong label require different views, different reference judgments and different responses. Write down the product family, the surface to inspect, the defect classes, the minimum visible severity and what the system should do when it finds a problem. Is it merely alerting an inspector, diverting a part to rework, or stopping the line? Each choice has a different cost of error.
The quality team, not a generic model benchmark, must define the boundary between acceptable variation and a reject. A tool mark may be normal on one face of a component but unacceptable on another. If inspectors disagree about this boundary, collecting more images will not by itself resolve the ambiguity. Settle the decision rule, or explicitly keep the disputed case in a human-review category. For a broader overview of applications and project costs, see our business guide to computer vision; this article focuses on accepting or rejecting a tightly scoped inspection pilot.
Treat missed defects and false rejects separately
A missed defect can lead to customer complaints, rework or a safety issue. A false reject can waste an inspector’s time, consume material or interrupt throughput. A single overall “accuracy” score hides that trade-off, especially when most parts are good. Record both error types for each defect class and agree on the operational consequence of each before tuning a threshold.
The system may be useful even if it cannot make the final decision. For instance, it may route uncertain parts to an inspector while leaving the existing quality gate intact. Conversely, a detector that produces frequent nuisance alerts can lose operator trust even if it catches most visible defects. Acceptance targets should follow the actual process risk and the value of the intervention, not a universal percentage promoted by a supplier.
Make imaging repeatable before collecting a dataset
The camera, optics and lighting determine what information a model receives. A reflective finish changes dramatically with light angle. Conveyor vibration, part orientation, motion blur, dust on the lens and an operator’s shadow can all mimic or conceal a defect. Fix the image capture position, trigger point and illumination as far as the pilot allows, then document the remaining variation.
Take a small sample of raw images and ask experienced inspectors whether they can consistently see the proposed defect in them. If the relevant edge is outside the field of view, software cannot establish that the edge is sound. If the scratch only appears under angled light, the lighting design is part of the inspection specification. This early check can prevent spending the entire pilot on model tuning when the real constraint is image acquisition.
Design an explicit invalid-image path
An out-of-frame part or an overexposed image should not quietly become a “pass.” Add an invalid-image or needs-review outcome and decide what happens when the camera, network or storage fails. Automatic acceptance during an outage is a different business decision from a controlled fallback to manual inspection. Document that decision with production and quality leaders and test it rather than assuming the process will improvise safely.
Keep examples of failed captures. They help separate a model error from a camera or lighting problem, and they give maintenance staff concrete signals to watch. Lens cleaning, lighting drift and timing checks may belong in the station’s routine maintenance plan. An inspection system is a combination of hardware, software and people; a model score alone cannot describe its reliability.
Build the reference labels with quality experts
Organize the images so each can be connected to the relevant product variant, station, batch or production period. Record the defect type and the quality decision, not just a vague “good/bad” folder name. If your quality standard uses grades, capture the grade and the action it implies. Preserve the reason for difficult decisions so later reviewers can determine whether the model or the reference label was wrong.
Have two reviewers assess a sample of borderline images independently. Disagreement is useful diagnostic evidence: perhaps the standard needs clarification, the image is inadequate, or a surface mark is legitimately ambiguous. Resolve what can be resolved, and reserve a human-review state for what cannot. Include acceptable lookalikes as well as genuine defects. Otherwise, an unusual but permitted texture may trigger repeated false alarms.
Our AI readiness checklist addresses ownership and governance across a business. Here those questions become concrete: who may change a label, who can access the image archive, how long is a capture retained, and how are personnel or confidential production details protected? These decisions should be recorded before uploading production images to a vendor’s environment.
Keep evaluation independent of training
Adjacent video frames and parts from the same batch can be nearly identical. Mixing them between training and evaluation can make a detector look stronger than it is. Hold out later batches or production periods, and avoid using the test set repeatedly to tune the model. Include known defect examples while also reporting how common defects are in normal operation. A deliberately defect-rich test collection is helpful for analysis but does not represent everyday alert volume.
Cover expected operating differences: shifts, lighting conditions, product versions, line speed and material sources where relevant. If the pilot has no evidence for one of these, state that limitation. A good result from a single afternoon does not establish performance over a month of production. The NIST AI Risk Management Framework emphasizes evaluation in the intended context, documented measurement and continued monitoring after deployment.
Write acceptance criteria before seeing the score
For each defect class, report raw counts alongside rates: correctly flagged defective parts, missed defective parts, correctly accepted good parts and incorrectly flagged good parts. A zero-miss claim based on a handful of examples is not evidence that misses will be rare on a production line. If no examples of a defect appeared in the held-out set, do not report a performance rate for that defect.
If the system must highlight the defect location, evaluating only an image-level yes/no answer is insufficient. Agree with inspectors how precise the location must be to help them decide. Measure the time from capture to action, throughput at ordinary line speeds and recovery after interrupted service separately from classification quality. A detector that is accurate on stored images may still be unusable at the station’s operating speed.
There is no responsible universal threshold for this pilot. A cosmetic mark and a safety-relevant flaw require different evidence and different fallback rules. Document who approves the target, which test data will be used and what triggers re-evaluation. The NIST measurement playbook recommends documenting test sets, methods and limitations rather than presenting an unexplained headline metric.
Compare against the real baseline
Do not compare the pilot with an invented picture of manual inspection. Run the detector in shadow mode for a bounded period: inspectors continue making the operational decision while the system records its prediction and timing. Review disagreements independently. The system may catch something a person missed; the person may recognize a harmless mark that the system flagged. Disagreement alone does not establish which side was correct.
When the acceptance target is not met, classify the failure. Is the camera missing the relevant surface? Are labels inconsistent? Is a rare defect underrepresented? Did the product or lighting change? Is the model unsuitable? The next decision might be to improve lighting, gather targeted data, narrow the scope or stop the project. Our pilot-versus-rollout guide explains why this decision gate should be separate from a commitment to full deployment.
A practical example: scratches on a metal housing
Imagine a plant inspecting the visible outer face of a metal housing before packaging. Quality staff lay out rejected scratches beside permitted machining traces. Some scratches are visible only under angled illumination. That discovery changes the first technical task: stabilize the light and camera position before comparing algorithms.
Images are linked to production batches. Reviewers label borderline samples independently, then reconcile disagreements against the written quality standard. Several shifts are represented, and later batches remain untouched for evaluation. The prototype gives three outcomes: accept, human review, and invalid image. An uncertain prediction is not silently converted to acceptance.
During shadow operation, the inspector still decides. The team records the model’s output, the inspector’s decision and the elapsed time. The final report separates error counts by surface finish, scratch severity and shift. If misses cluster under one lighting condition, an overall average must not hide that weakness. The team may fix the lighting and rerun the same acceptance procedure, rather than declaring success from a favorable subset of images.
What should be delivered at the end of the pilot?
The model file is only one deliverable. Request the imaging configuration, defect definitions, labeling instructions, dataset split method, model version, test report, examples of failures, alert rules and manual fallback procedure. Specify how the plant can export its images and decisions. Without these materials, a future audit, model update or supplier change becomes unnecessarily difficult.
If a rollout is proposed, define how performance will be watched after launch. Who checks an increase in false alerts? What happens when a camera is replaced, a new surface finish appears or a supplier changes material? Can the team trace a decision to a model version and revert safely? A fixed old test set is not a permanent guarantee; fresh production samples need a controlled review process.
Before selecting a delivery partner, ask for a sample error report, a plan for reference labeling and a specific fallback workflow. Our guide to choosing an AI implementation partner lists useful commercial and technical questions. A dashboard showing a percentage without an independent test method does not answer them.
Conclusion and next step
A successful pilot gives the plant enough evidence to decide where the system helps, where it fails and whether further investment is justified. Start with one part, one station and a defect that quality staff can define. Make the imaging and labels dependable, measure both missed defects and false rejects, and test the fallback before allowing automated decisions to affect production. “Not ready yet” is a valuable result when the reasons are clear and actionable.
If you need help scoping the station, collecting defensible evidence and defining acceptance criteria, explore EasySaz AI services. Bring a few acceptable and unacceptable samples, the current inspection standard, capture constraints and the consequences of each error to an initial discussion. That makes a project proposal specific to your line rather than a generic computer-vision demonstration.